TFT Tanking Guide: The Formula Behind Unkillable Frontlines
TL;DR — The formula behind frontlines that actually survive: Effective HP = HP x Resistances x Durability. Most players overstack one bucket and starve the other two. This guide breaks down all three, shows how to itemize around what your tank trait already covers, and explains the CC tank that ignores the formula entirely.
Tanking isn’t about piling on the most defensive items — it’s about balancing three multiplicative buckets and filling whatever your trait doesn’t give you. Get that right and your frontline stops melting.
Introduction
You just lost a fight and your frontline melted in seconds. Your tank had the “right” items on paper — but died instantly anyway.
The problem isn’t your items. The problem is that most players have no idea how tanking actually works.
This guide breaks down the formula behind tanking damage, the biggest mistakes players make when building tanks, and — at the end — the one type of tank that ignores this formula entirely. Once you understand this, you’ll never watch your frontline melt again.
Part 1 — The Three Buckets of Effective HP
Every tank in TFT has one number that actually matters — and it’s not the number on their health bar. It’s their Effective HP (EHP): the real measure of how long your tank survives.
The EHP Formula
Effective HP = HP × Resistances × DurabilityEach of these is a separate bucket. Just like damage, you need a combination of all three to maximize survivability.
Bucket 1: HP (Health Points)
What it is: Your foundation — the number everything else multiplies off of.
Shields: Work exactly like HP. Think of them as bonus HP.
Why it matters
- The more HP you have, the more value you get from every point of resistances and durability.
- It’s always your starting point.
HP items
| Item | Value |
|---|---|
 Warmog’s Armor | High HP |
 Sunfire Cape | HP + utility |
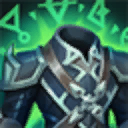 Spirit Visage | HP + durability |
Bucket 2: Resistances (Armor & Magic Resist)
What it is: Reduces damage by a percentage based on the damage type.
| Resist type | Reduces |
|---|---|
| Armor | Physical damage |
| Magic Resist | Magic damage |
The math
- Every 100 points of a resist doubles your EHP against that damage type.
- Example: 1,000 HP + 100 Armor = effectively 2,000 physical EHP.
The Sunder / Shred problem
| Scenario | Armor | After Sunder | Armor lost |
|---|---|---|---|
| Low armor | 100 | 70 | 30 |
| High armor | 300 | 210 | 90 |
Key insight — The more you stack one resist, the more you hand back to your enemy for free if they have Sunder or Shred.
Rule of thumb — Build resistances based on your specific lobby. Don’t over-stack one resist type.
Resist items
| Item | Resist type |
|---|---|
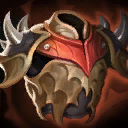 Bramble Vest | Armor |
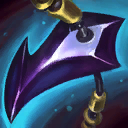 Dragon’s Claw | Magic Resist |
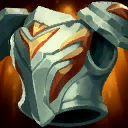 Gargoyle Stoneplate | Both |
Bucket 3: Durability
What it is: Damage reduction that multiplies on top of everything else.
How it works
- After resists do their job, durability reduces whatever damage is left.
- Works against both physical AND magic damage.
Durability stacks multiplicatively
| Scenario | Calculation | Result |
|---|---|---|
| 10% durability | 100% − 10% | Taking 90% damage |
| Add another 10% | 90% × 10% | Taking 81% (not 80%) |
Why this matters
- You can never reach 100% durability.
- Each source reduces what’s left, not the original number.
- Still a valuable stat — it just doesn’t stack additively.
Durability items
| Item | Value |
|---|---|
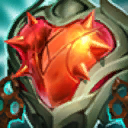 Steadfast Heart | Primary durability |
| Spirit Visage | Durability + HP |
Part 2 — Why Most Players Get It Wrong
The Three-Bramble-Vest Trap
| Items | HP | Armor | MR | Durability |
|---|---|---|---|---|
| Bramble Vest x3 | Low | Overflowing | Starving | None |
Problems
- The armor bucket is overflowing.
- HP, MR, and durability are all starving.
- Sunder hands all that armor back to the enemy anyway.
The Three-Warmog’s Trap
| Items | HP | Armor | MR | Durability |
|---|---|---|---|---|
| Warmog’s x3 | Massive | None | None | None |
Problems
- HP is massive, but it’s multiplying nothing.
- No resists → all that HP is wasted.
- No durability → damage reduction is missing.
The Sweet Spot
Every set, the answer is somewhere in the middle.
| Scenario | What to build |
|---|---|
| Low HP | HP items (Warmog’s) |
| Low resists | Resist items (Bramble, Dragon’s Claw) |
| Low durability | Durability items (Steadfast Heart) |
Rule of thumb — Know what your tank trait already covers, and build around what it doesn’t have.
Part 3 — Applying the Formula: Tank Trait Examples
HP Traits (Bruisers, Brawlers)
What they give
- The HP bucket is already covered.
- You need resists and durability.
Priority items
| Priority | Item |
|---|---|
| 1 | Bramble Vest (Armor) |
| 2 | Dragon’s Claw (MR) |
| 3 | Steadfast Heart (Durability) |
| 4 | Spirit Visage (Durability + HP) |
| Low | Warmog’s Armor (you already have HP) |
Augment example: Bruiser frontline
| Augment | Effect | Verdict |
|---|---|---|
| Lineup | Gives resists | Great — fills an empty bucket. |
| A tank-scaling augment | Gives durability | Great — fills an empty bucket. |
| Boxing Lessons | Gives HP | Weakest — the trait already covers this. |
Bonus — A tank-scaling augment that rewards a high-HP unit triggers off a big enough frontliner. Bruisers hit that threshold easily.
Resist Traits (Defenders, Sentinels, Vanguards)
What they give
- The resist bucket is already covered.
- You need HP and durability.
Priority items
| Priority | Item |
|---|---|
| 1 | Spirit Visage (Durability + HP) |
| 2 | Warmog’s Armor (HP) |
| 3 | Steadfast Heart (Durability) |
| Low | Bramble Vest / Dragon’s Claw (you already have resists) |
Augment example: Resist frontline
| Augment | Effect | Verdict |
|---|---|---|
| Lineup | Gives resists | Weakest — the trait already covers this. |
| A tank-scaling augment | Gives durability | Great — fills an empty bucket. |
| Boxing Lessons | Gives HP | Great — fills an empty bucket. |
Durability Traits (Juggernauts, Watchers)
What they give
- The durability bucket is already covered.
- You need HP and resists.
Priority items
| Priority | Item |
|---|---|
| 1 | Warmog’s Armor (HP) |
| 2 | Bramble Vest (Armor) |
| 3 | Dragon’s Claw (MR) |
| Low | Steadfast Heart / Spirit Visage (you already have durability) |
Augment example: Durability frontline
| Augment | Effect | Verdict |
|---|---|---|
| Lineup | Gives resists | Great — fills an empty bucket. |
| A tank-scaling augment | Gives durability | Weakest — the trait already covers this. |
| Boxing Lessons | Gives HP | Great — fills an empty bucket. |
Part 4 — The CC Tank: The One That Ignores the Formula
The Concept
Everything we’ve covered assumes your tank survives by absorbing damage. But what if there’s another way to stop taking damage altogether? Enter the CC tank.
If your frontliner has a hard CC ability — a stun, knock-up, or root — every second the enemy team spends locked down is a second they aren’t attacking. That’s perfect tanking.
Example: A CC Tank
| Ability | Effect |
|---|---|
| Stun | Stuns the largest group of nearby enemies for almost 2 seconds. |
Why it’s huge
- If a crowd-control frontliner is casting, it’s pausing the entire team’s damage.
- That’s massive value that doesn’t show up in the damage numbers.
How to Build a CC Tank
The goal: Make them cast faster, not survive longer.
Priority items
| Item | Why |
|---|---|
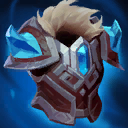 Protector’s Vow | Mana + survival |
 Adaptive Helm | Mana regen |
| Spirit Visage | Durability + HP + mana |
 Blue Buff | Faster casts |
What you don’t need
- Full tank itemization (Warmog’s x3, Bramble x3).
- Trying to make them unkillable.
The goal is simple
- Give them enough to survive.
- Give them enough to cast.
- Let them CC the enemy team.
- Buy time for your real carries.
Critical Distinction: CC Tank vs Main Tank
| Role | Job | Items |
|---|---|---|
| CC tank | Interrupt the fight | Mana + survival |
| Main tank | Absorb the hits | HP + resists + durability |
The rule
- Don’t put your main-tank items on the CC tank.
- Don’t put mana items on the main tank.
- Your team needs both — they serve completely different purposes.
Part 5 — The Formula in Action: Quick Reference
The EHP Checklist
| Bucket | Check | Solution |
|---|---|---|
| HP | Is your HP low? | Warmog’s Armor, Sunfire Cape |
| Armor | Is your armor low? | Bramble Vest, Gargoyle Stoneplate |
| MR | Is your MR low? | Dragon’s Claw, Gargoyle Stoneplate |
| Durability | Is your durability low? | Steadfast Heart, Spirit Visage |
Trait-Based Priority Guide
| Trait type | What you have | What you need | Best items |
|---|---|---|---|
| HP (Bruisers) | HP | Resists + durability | Bramble, DClaw, Steadfast |
| Resists (Vanguards) | Armor + MR | HP + durability | Warmog’s, Spirit Visage |
| Durability (Juggernauts) | Durability | HP + resists | Warmog’s, Bramble, DClaw |
| CC tank | Utility | Mana | Protector’s Vow, Adaptive Helm |
Augment Selection Guide
| Frontline type | Best augment | Worst augment |
|---|---|---|
| Bruiser (HP) | Lineup or a tank-scaling augment | Boxing Lessons |
| Vanguard (Resists) | Boxing Lessons or a tank-scaling augment | Lineup |
| Juggernaut (Durability) | Lineup or Boxing Lessons | A tank-scaling augment |
Part 6 — Common Mistakes & How to Avoid Them
| Mistake | Why it’s wrong | Fix |
|---|---|---|
| Stacking one resist | Sunder/Shred gives free value | Balance your resists. |
| Warmog’s on Bruisers | The trait already covers HP | Build resists instead. |
| Bramble on Vanguards | The trait already covers armor | Build HP / durability. |
| Full tank on a CC tank | They need mana, not survivability | Build mana + survival. |
| Ignoring lobby composition | Wrong resist for the lobby | Scout AP vs AD. |
Part 7 — Summary: The Tanking Formula
The Core Principles
- Effective HP = HP × Resists × Durability — you need all three.
- Don’t overflow one bucket — spreading stats gives more EHP than stacking one.
- Sunder/Shred punishes over-stacking — build based on your lobby.
- Traits tell you where to start — fill what your trait doesn’t give.
- CC tanks are different — they buy time, they don’t absorb damage.
- The main tank still needs the full formula — someone has to eat the hits.
The Decision Flowchart
1. What trait is my frontline?
   ├─ HP trait         → Build Resists + Durability
   ├─ Resist trait     → Build HP + Durability
   └─ Durability trait → Build HP + Resists

2. Is this a CC tank?
   ├─ Yes → Build Mana + Survival
   └─ No  → Build the full tank formula

3. What's the lobby?
   ├─ AD-heavy → Prioritize Armor
   ├─ AP-heavy → Prioritize MR
   └─ Mixed    → Balance both

4. What augments complement my tank?
   ├─ Fill weak buckets
   └─ Avoid redundant buckets
Final Thoughts
Your tank dies because you were stacking the wrong bucket.
- Know what your tank trait already covers.
- Build around what it doesn’t have.
- Balance HP, resists, and durability.
- If it’s a CC tank, give it mana — not your HP/resist/durability items.
- Save those for your main tank.
Do this, and your frontline stops melting — and starts taking over.
Good luck on the Convergence — and may your tanks never die.
Frequently asked questions
What is effective HP in TFT?
Effective HP (EHP) is the real measure of how long a tank survives, calculated as HP x Resistances x Durability. The three buckets are multiplicative, so you need a combination of all three to maximize survivability rather than overstacking one.
Why does my tank die so fast in TFT?
Usually because you stacked one bucket and starved the others. Three Warmog's gives massive HP that multiplies nothing without resists or durability; three Bramble Vests overflow armor that Sunder hands back. Spreading stats across HP, resists, and durability gives far more EHP.
What are the best tank items in TFT?
It depends on the bucket you lack. For HP use Warmog's Armor or Sunfire Cape; for resists use Bramble Vest (Armor), Dragon's Claw (MR), or Gargoyle Stoneplate; for durability use Steadfast Heart or Spirit Visage. Build whatever your tank trait does not already cover.
How this guide was made: researched, drafted or edited with AI tools from MadeByKeo's notes, Riot's own sources and our own data. MadeByKeo decides what is published. How we make guides
Put this into practice
- Set 18 comps tier list: every live comp ranked by tier, with carries, items and the full board.
- TFTSense features: what the coach calls during a game, read from your screen.
- TFTSense compared with other TFT apps: Mobalytics, MetaTFT, TFT Academy, Blitz and more, feature by feature.
- Download TFTSense: the Windows installer.
Questions, or want a hand with your climb? Come hang out with us.
Join the Discord