TFT Augment Selection Framework: Choose the Right Augment Every Game
TL;DR — Three augment choices, and the OP one still tanks your game — because you picked the wrong type, not a bad augment. This framework sorts every augment into four types (econ, item, combat, direction) and tells you which to prioritize from your board state: items before your carry is itemized, combat after, econ to recover, direction for a plan.
Type first, OP second. The most broken augment in the lobby is still a mistake if it’s the wrong type for your board right now — and this framework tells you which type that is, every patch and every set.
Introduction
You have three augment choices. You pick the one that’s considered “most OP.” Your board never comes together. You lose a ton of HP, go 4th, and wonder what went wrong.
You didn’t choose a bad augment. You chose the wrong type of augment for your specific game.
This guide is a framework for choosing the right augment every game — every patch, every set, regardless of what’s OP at the time.
Part 1 — The Four Augment Types
Type 1: Econ Augments
What they do: Give gold, experience, or rerolls.
| Effect | Example |
|---|---|
| Gold | +10 gold now. |
| Experience | A free level. |
| Rerolls | Free shop refreshes. |
Purpose: Help you make money to find your board faster.
Type 2: Item Augments
What they do: Give completed items, components, artifacts, or emblems.
| Effect | Example |
|---|---|
| Completed items | A free item or component. |
| Artifacts | Unique items. |
| Emblems | Trait-specific emblems. |
Purpose: Directly increase board strength by giving units better stats.
Type 3: Combat Augments
What they do: Provide effects that help during fights.
| Effect | Example |
|---|---|
| Damage amp | More damage. |
| Shields | Survivability. |
| Healing | Sustain. |
| Utility | CC, buffs, and so on. |
Purpose: Make boards cap out high. The impact can be hard to gauge, but it’s significant.
Type 4: Direction Augments
What they do: Give you a game plan — or double down on one you already have.
| Effect | Example |
|---|---|
| Trait augments | A vertical trait direction. |
| Unit-specific | Hero augments. |
| Random emblems | Direction from randomness. |
Purpose: Push you toward a specific comp.
Part 2 — The Framework
The Core Rule
| Augment type | Best when |
|---|---|
| Item augments | Before carries are fully itemized. |
| Combat augments | After carries are fully itemized. |
| Econ augments | Board is weak — you need to recover and 2-star/3-star. |
| Direction augments | You need a game plan, or you’re doubling down on one. |
Why This Works
The math of items
Items have a multiplicative effect on your carry’s damage.
| Items | Effect |
|---|---|
| 0 → 1 | A huge jump. |
| 1 → 2 | Even bigger. |
| 2 → 3 | The carry becomes a real threat. |
The implication
- Item augments are incredibly valuable early.
- Each item adds multiplicative power at a stage where every item counts.
- Once your carry has 3 items and your tank has 3 items, additional item augments have diminishing returns.
The Combat Augment Logic
A combat augment essentially acts as a fourth item for your main carry.
| Situation | Value |
|---|---|
| Carry has 3 items | The combat augment is a 4th item — high value. |
| Carry has 1 item | It multiplies a small number — low value. |
The priority
- Fill item slots first.
- Layer combat on top.
Part 3 — Examples
Example 1: Item Augment Over Combat
Scenario
- Playing AD.
- Got dropped all AP components on 2-7.
- Six-streaking into the 3-2 augment choice.
Options
- Sword Overflow (
 Shojin +
 Deathblade +
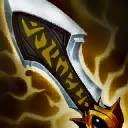 IE).
- A crit augment (a combat augment).
Decision: Take Sword Overflow.
Why: A 3-item  Ezreal now will do more damage than the crit augment. Items beat combat when you don’t already have a 3-item carry.
Example 2: Combat Augment Over Item
Scenario
- You already have shred + anti-heal.
- You have your main carry at 2-star and a second strong carry at 2-star.
- You don’t need econ to stabilize.
Decision: Take the combat augment.
Why: You can multiply stats on great units and give them a “fourth item” via the combat augment. Items are already covered.
Example 3: Econ Augment for a Weak Board
Scenario
- A weak board.
- You messed up your early-game shops.
- A bad opener.
Decision: Take the econ augment.
Why: Econ augments are the escape hatch. They let you make money through other means and spike later by 2-starring/3-starring your board.
Part 4 — The 2-1 Augment Choice
Why It’s the Most Important
The 2-1 augment shapes your entire game:
| Aspect | Impact |
|---|---|
| Comp | Direction. |
| Econ | Gold generation. |
| Streak potential | Win or loss. |
| HP | Going into mid/late. |
Applying the Framework at 2-1
| Situation | Best augment type |
|---|---|
| Strong board | Item augment (the default). |
| Weak board | Econ augment (the safe choice). |
| Need direction | Direction augment. |
Why combat augments are worse at 2-1
- You almost never have a fully itemized carry.
- Combat effects don’t have strong impact until later.
- Items are more valuable early.
Direction Augments at 2-1
The hard part: Knowing when to take which type.
Example: a bad direction augment
| Situation | Problem |
|---|---|
 Veigar 2 + a frontline tank at 2-star | You already have a strong direction. |
| Offered Spreading Roots | Forces randomness on top of a strong direction. |
| Bench not flexible | Weakens your board. |
Example: a good direction augment
| Situation | Benefit |
|---|---|
| Full bench | Lots of possibilities. |
| Ambiguous direction | You need to be nudged. |
| Offered Spreading Roots | Random emblems help find direction. |
Watch Out for Slow-Burn Augments
Examples: a slow-burn econ augment, Augmented Power.
Before taking one, ask yourself:
- Can I survive the early game while being down an augment?
- Sometimes the answer is yes — but know that the whole lobby has a full augment over you.
Part 5 — 3-2 and 4-2 Augments
Same Framework, More Context
At 2-1, you’re making an educated guess based on Stage 1. By 3-2 and 4-2, you should have a much clearer picture:
| Information | What you know |
|---|---|
| Comp | What you’re playing. |
| Contested | How many others are on it. |
| Items | What you have. |
| Gold | How much you need. |
| HP | When you need a spike. |
Use This Information
Example
- High econ from your first two augments → not worried about hitting.
- Worried about board strength → choose between items or combat.
Decision framework
| Need | Choice |
|---|---|
| Need to hit your board | Econ. |
| Need board strength | Items. |
| Have items, need power | Combat. |
Part 6 — The Biggest Mistake
The Trap
Most players think: “Which augment is OP? Which is trash?”
The problem
- Yes, some augments are genuinely broken.
- Some are genuinely terrible.
- But these change patch to patch, set to set.
The Right Order
| Order | What to consider |
|---|---|
| First | The augment type for your situation. |
| Second | Which specific augment is strongest. |
Taking the most OP augment at the wrong time is still a mistake.
Knowledge Pays Off
As you learn a set, you’ll figure out which augments are overperforming, which combat augments are OP with certain comps, and which item augments are overtuned. But that knowledge only pays off when you understand which augment type you should be taking in your specific situation.
Part 7 — Practical Tip: Prepare Before the Screen
The Preparation Principle
Before your augment selection screen appears, use the time beforehand to decide what type of augment you want to see.
| Benefit | Result |
|---|---|
| Faster decisions | Less time wasted. |
| Clearer decisions | Less tilt. |
| Better outcomes | A higher chance of the correct pick. |
Go into every augment knowing: “I want an item augment here,” or “I really need econ right now,” or “I need direction.” The decision becomes much faster and clearer when the augments are actually in front of you.
Part 8 — Summary: The Complete Framework
The Four Types
| Type | When to take |
|---|---|
| Item | Before carries are fully itemized. |
| Combat | After carries are fully itemized. |
| Econ | Board is weak — you need to recover. |
| Direction | You need a game plan, or you’re doubling down. |
The 2-1 Rule
| Situation | Choice |
|---|---|
| Strong board | Item augment. |
| Weak board | Econ augment. |
| Need direction | Direction augment. |
Combat is worse at 2-1 — it isn’t strong until carries are itemized.
The 3-2 / 4-2 Rule
| Situation | Choice |
|---|---|
| Need to hit | Econ. |
| Need board strength | Items. |
| Have items, need power | Combat. |
The Golden Rule
Type first, OP second — The most OP augment at the wrong time is still a mistake.
Final Thoughts
In the TFT fundamentals series, we’ve now covered:
- Damage — how damage works and how to maximize it.
- Econ — the econ loop, and why money doesn’t just make money.
- Itemization — balancing your stats.
- Augments — choosing the right type for your situation.
All four concepts work together:
| Concept | Purpose |
|---|---|
| Damage | Deal maximum damage. |
| Econ | Have gold when you need it. |
| Itemization | Put items on the right units. |
| Augments | Multiply everything. |
Master all four, and you’ll climb.
Good luck on the Convergence — and may your augment choices be wise.
Update log
- 2026-09-27: Examples updated for Set 18 patch 18.3; the Set 17 units in the examples were replaced with Ezreal and Veigar, and the named augments (Sword Overflow, Spreading Roots, Augmented Power) were checked against the Set 18 augment data.
Frequently asked questions
What are the four augment types in TFT?
Econ augments (gold, XP, rerolls), item augments (completed items, components, artifacts, emblems), combat augments (damage amp, shields, healing, utility during fights), and direction augments (trait, unit-specific, or random-emblem augments that point you toward a comp).
When should you take combat augments in TFT?
After your carries are fully itemized. A combat augment acts like a fourth item: it's high value when your carry already has 3 items, but only multiplies a small number when the carry has 1 item. Fill item slots first, then layer combat on top.
Which augment type is best at 2-1?
Item augment with a strong board, econ augment with a weak board, and direction augment when you need a game plan. Combat is worse at 2-1 because you almost never have a fully itemized carry yet and combat effects don't have strong impact until later.
How this guide was made: researched, drafted or edited with AI tools from MadeByKeo's notes, Riot's own sources and our own data. MadeByKeo decides what is published. How we make guides
Put this into practice
- Set 18 comps tier list: every live comp ranked by tier, with carries, items and the full board.
- TFTSense features: what the coach calls during a game, read from your screen.
- TFTSense compared with other TFT apps: Mobalytics, MetaTFT, TFT Academy, Blitz and more, feature by feature.
- Download TFTSense: the Windows installer.
Questions, or want a hand with your climb? Come hang out with us.
Join the Discord